We are all working to get rid of service account without MFA. One step forward is to use service principal with permissions and then connect. In this article I will guide you how to setup this solution to connect with AzureAD PowerShell.
Start PowerShell as administrator on your computer. Update the password (“pwd” in the code) to something secure. This will create a certificate for 1 year in c:\temp\name.pfx
$currentDate = Get-Date
$endDate  = $currentDate.AddYears(1)
$notAfter  = $endDate.AddYears(1)
$pwd  = "xDu1m6!dhe%IL8fRGgt0hPl"

$thumb = (New-SelfSignedCertificate -CertStoreLocation cert:\localmachine\my -DnsName domain.com -KeyExportPolicy Exportable -Provider "Microsoft Enhanced RSA and AES Cryptographic Provider" -NotAfter $notAfter).Thumbprint
$thumb

$pwd = ConvertTo-SecureString -String $pwd -Force -AsPlainText
Export-PfxCertificate -cert "cert:\localmachine\my\$thumb" -FilePath c:\temp\name.pfx -Password $pwd
Copy the thumbprint to notepad for later use. Next step is to import the certificate and store the key value in a variable for use when you create the service principal.
$cert  = New-Object System.Security.Cryptography.X509Certificates.X509Certificate("C:\temp\name.pfx", $pwd)
$keyValue = [System.Convert]::ToBase64String($cert.GetRawCertData())
Now we have the certificate created. Connect to the tenant as global administrator and create the service principal (Azure App Registration)
# Connect
Connect-AzureAD

# Create the Azure Active Directory Application
$application = New-AzureADApplication -DisplayName "AzureAD" -IdentifierUris "https://localhost"
New-AzureADApplicationKeyCredential -ObjectId $application.ObjectId -CustomKeyIdentifier "AzureAD" -StartDate $currentDate -EndDate $endDate -Type AsymmetricX509Cert -Usage Verify -Value $keyValue

# Create the Service Principal and connect it to the Application
$sp = New-AzureADServicePrincipal -AppId $application.AppId

# Disconnect current session
Disconnect-AzureAD
Connect to AzureAD with certificate.
Connect-AzureAD
# Get Tenant Detail
$tenant = Get-AzureADTenantDetail
# Now you can login to Azure PowerShell with your Service Principal and Certificate
Connect-AzureAD -TenantId $tenant.ObjectId -ApplicationId $sp.AppId -CertificateThumbprint $thumb
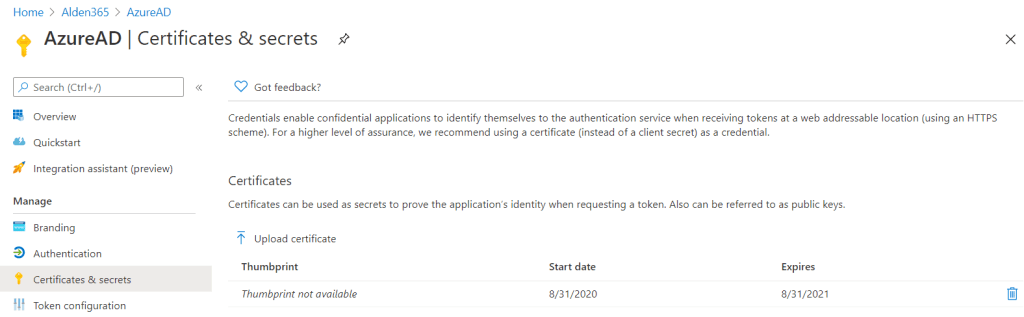
Disconnect-AzureADThe certificate is created and verified. You can use that in Azure Automation to schedule script. Below step will guide how to configure a runbook. Navigate to this url https://portal.azure.com/#blade/Microsoft_AAD_IAM/ActiveDirectoryMenuBlade/RegisteredApps and see that the AzureAD app is created. Open and push “Certificates & secrets”. Verify that certificate is there and the expires is 1 year.
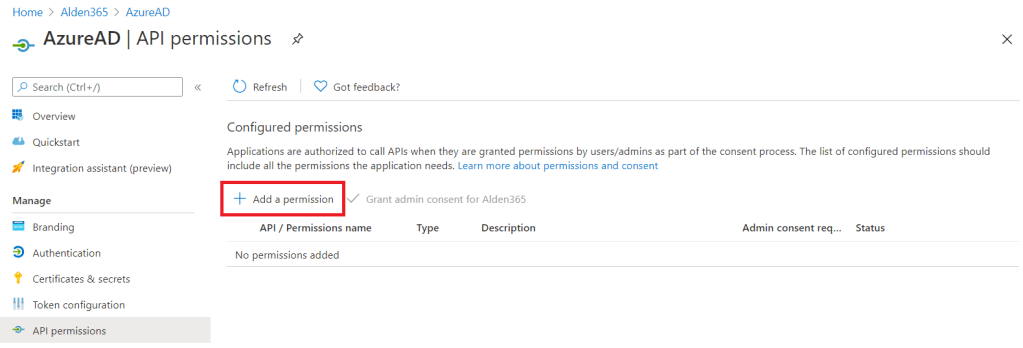
Push API permissions and “Add a permission”
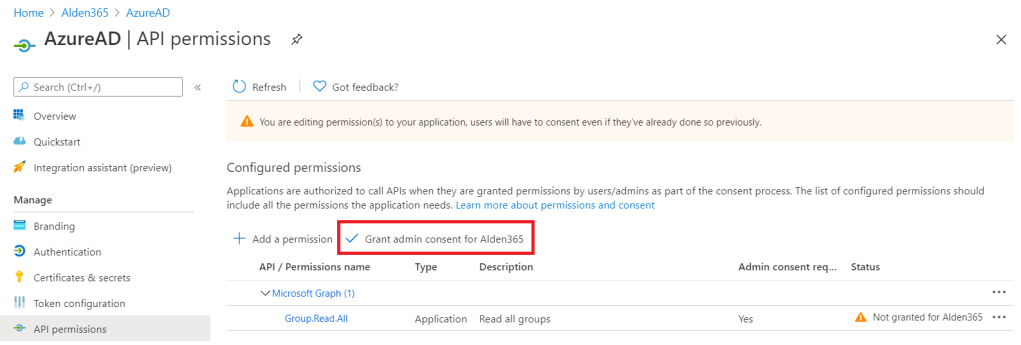
Choose Microsoft Graph, Application permissions and select “Group.Read.All”. Add permissions. Before the permissions are working you need to “Grant admin consent for the organization”. When that is done you have an connection endpoint. Note: It can take a while before permissions working when you connect.
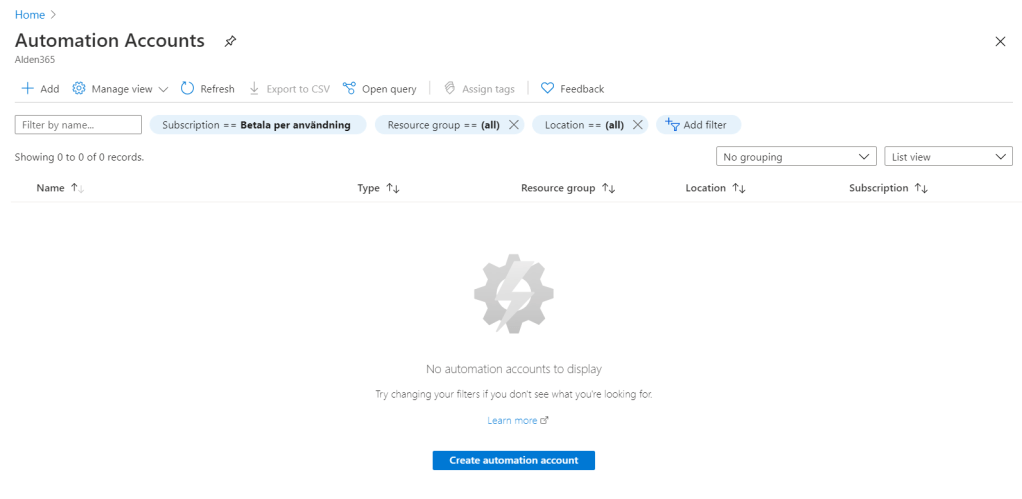
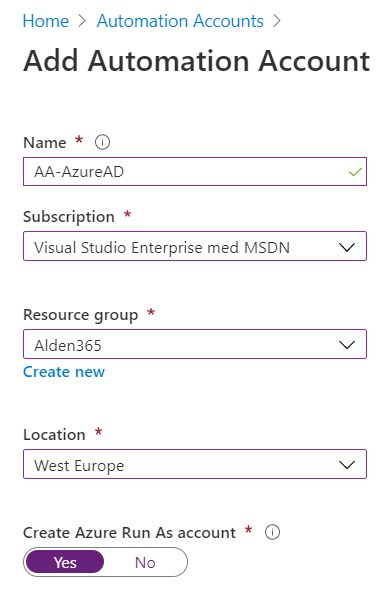
From here you leave the application and start Azure Automation. Create automation account and name the automation account.
The Automation Account is created and you need to upload the certificate you created earlier but before that, import the module AzureAD. Push the module and select Import Module.

Verify in modules that you can see the imported module. Push the Certificates. Add a certificate. Name it and choose the exported certificate on your local computer. Use the password you choose when the certificate was created. Open runbooks and create your own script. I will show an example below.
#Variables
$TenantId = "14dxx877-ddxx-4xxx-8xxx-d71xxxxb9xxx"
$ApplicationId = "3897417c-32cb-4e91-b428-93b8d20e8536"
$Thumbprint = "5c665c0eb44a077b5db8931b895517a569c3cc1b"

#Connect to AzureAD
Try {
    #Write-Output 'Connecting to services'
    Connect-AzureAD -TenantId $TenantId -ApplicationId $ApplicationId -CertificateThumbprint $Thumbprint | Out-null
    }
Catch {
    Write-Error -Message $_.Exception.Message
    #Hangup
    Disconnect-AzureAD | Out-null
    Break
}
Write-Output "Connect process done"
# Function
try {
    Write-Output 'List all groups'
    $groups = Get-AzureADGroup -All
 $true
    Write-Output $groups
}
Catch {
    Write-Error -Message $_.Exception.Message
    #Hangup
    Disconnect-AzureAD
}
This script will list all groups and write an output to the log in runbook. You can play around with this and build your own script to maintain Azure Active Directory. Don´t forget to give you correct permissions before.

Please fix the minor error in your pasted code block in catch, block must be properly closed with a }. You probably missed it on the paste into the blog.
LikeLike
Thanks, code is updated now.
LikeLike